Move Out Cleaning: A Practical, Room-by-Room Approach to Leaving a Property Spotless
Move out cleaning is one of the most important tasks when leaving a home, apartment, or rental property. Whether you are a tenant hoping to secure your deposit, a landlord preparing for new occupants, or a homeowner getting ready to sell, a thorough move out cleaning can make a major difference. A clean property creates a strong final impression, reduces disputes, and helps the next chapter begin on the right foot.
Many people underestimate how detailed move out cleaning can be. It is not the same as everyday tidying or a quick weekend refresh. Instead, it focuses on every corner, surface, fixture, and hidden area that may have collected dust, grime, grease, soap scum, and residue over time. When done properly, move out cleaning helps restore a property to a presentable condition that feels fresh, organized, and ready for inspection.
In this article, we will explore what move out cleaning involves, why it matters, which areas need the most attention, and how to create a practical plan for success. You will also find useful tips for handling difficult messes, saving time, and deciding when professional move out cleaning services may be worth considering. Book your service now if you need help before your final deadline.
What Move Out Cleaning Really Means
Move out cleaning is a deep and detailed cleaning process completed before vacating a property. It goes beyond surface-level cleaning and usually includes everything from baseboards and ceiling fans to appliances, cabinets, bathrooms, and floors. The goal is to leave the place as neat and clean as possible after furniture has been removed and personal belongings are packed away.
This type of cleaning is often required at the end of a lease, but it is also valuable in other situations. If you are selling a house, preparing a short-term rental, or helping a family member relocate, move out cleaning ensures the property feels cared for. In many cases, a proper move out cleaning can improve the chances of getting a deposit back or increase the appeal of the home for future buyers.
Move out cleaning is best handled with a checklist and a realistic timeline. Since each room has different surfaces and trouble spots, it helps to clean in a logical order. Start high, then work downward. Begin with dusting, then move to wiping, scrubbing, vacuuming, and mopping. This method reduces repeated work and makes the process more efficient.
Why Move Out Cleaning Matters
There are several reasons why move out cleaning should never be treated as an afterthought. First, it helps meet lease requirements. Many rental agreements state that the property must be returned in a clean condition. If the apartment is left dirty, a landlord may deduct cleaning fees from the security deposit. A careful move out cleaning can help avoid that outcome.
Second, it supports a smoother handoff between occupants. When the property is fresh and orderly, the next resident can move in with less stress. For homeowners, a clean space also creates a stronger visual impression during showings and inspections. Buyers often notice cleanliness immediately, and a well-kept home can feel more inviting.
Third, move out cleaning provides peace of mind. Moving is already a demanding process with many details to manage. Knowing the property has been cleaned properly allows you to focus on transportation, unpacking, and settling into your new place. A clean exit often makes the entire moving experience feel more complete.
Move Out Cleaning Checklist for the Whole Property
Start with a plan

Before you begin, create a checklist that covers every room and major surface. A structured approach prevents overlooked spots and makes the work easier to manage. Move out cleaning can take several hours or even multiple days depending on the size of the property, so planning ahead is essential.
Here are the main tasks that should usually be included in move out cleaning:
- Remove trash and leftover items
- Dust all surfaces, vents, and corners
- Clean windows, sills, and tracks
- Wipe doors, handles, and light switches
- Clean kitchen appliances inside and out
- Scrub bathrooms, toilets, showers, and sinks
- Vacuum carpets and mop hard floors
- Clean baseboards, trim, and reachable wall marks
- Check closets, cabinets, and drawers for debris
With this list in hand, you can work room by room and track progress more easily. A well-organized move out cleaning process reduces stress and helps ensure nothing important is missed. If time is limited, prioritize the areas that are most visible or most likely to be inspected carefully.
Kitchen Move Out Cleaning Essentials
Grease, crumbs, and hidden buildup
The kitchen is often the most demanding area in move out cleaning because it contains appliances, food residue, grease, and numerous surfaces that collect grime. Even if the kitchen has been used carefully, small amounts of buildup can make the room appear neglected. That is why a detailed cleaning routine is so important here.
Focus first on the refrigerator, oven, microwave, dishwasher, and range hood. Remove shelves and drawers where possible, wipe them thoroughly, and clean inside compartments. Pay attention to burner grates, drip pans, knobs, and the area behind or beneath appliances if they can be moved safely. Move out cleaning in the kitchen should also include cabinets, countertops, sinks, faucets, and backsplash areas.
Do not forget the final touches. Empty and wipe trash bins, polish stainless steel surfaces, and sweep under tables and chairs. If cabinets have lingering odors, place a small amount of odor absorber inside them after cleaning. Move out cleaning in the kitchen can feel intensive, but it is one of the most rewarding spaces to refresh.
Helpful kitchen cleaning order

To save time, it helps to clean the kitchen in this sequence:
- Remove all food, trash, and loose items
- Degrease the oven, stovetop, and hood
- Clean the refrigerator and freezer
- Wipe inside and outside of cabinets
- Disinfect sink, faucet, and counters
- Sweep, vacuum, and mop the floor
This order supports efficient move out cleaning because it moves from the dirtiest task to the finishing touches. Once the kitchen is complete, the entire property already starts to feel much cleaner and more organized.
Bathroom Move Out Cleaning for a Fresh Finish
Bathrooms need special attention during move out cleaning because soap scum, water spots, mildew, and mineral deposits can build up quickly. Even when a bathroom looks fairly clean at first glance, close inspection often reveals residue around taps, drains, tile grout, and shower doors. For this reason, bathroom cleaning should always be thorough and methodical.
Begin by scrubbing the toilet, sink, tub, and shower. Use an appropriate cleaner to remove stains, and pay attention to the base of the toilet and the edges around the tub. Wipe mirrors until streak-free, clean light fixtures, and disinfect all high-touch points such as flush handles, faucet levers, and cabinet pulls. Move out cleaning in bathrooms should also include vent covers, towel bars, and shelving.
For best results, remove hair and debris from drains, polish fixtures, and mop the floor last. If grout lines have darkened over time, a targeted scrub can improve the room’s appearance significantly. A clean bathroom helps the property feel sanitary and well maintained, which is exactly what you want during a final walkthrough.
Bathroom touchpoints that matter most
When performing move out cleaning in a bathroom, these areas deserve special focus:
- Toilet seat, lid, bowl, and base
- Sink basin and faucet handles
- Shower walls, glass doors, and curtain rods
- Medicine cabinet shelves
- Mirror edges and light switch plates
- Floor corners and around the toilet
These high-touch zones can make a big difference in how clean the bathroom appears. A polished bathroom is often one of the clearest signs that a property has received careful move out cleaning. It also helps the space feel fresh for the next occupant.
Living Room and Bedroom Move Out Cleaning
Attention to dust and overlooked surfaces
Living rooms and bedrooms may not collect grease or soap residue, but they often gather dust, pet hair, fingerprints, and small debris in hidden areas. Move out cleaning in these rooms should focus on both visible surfaces and less obvious spots such as behind furniture, under beds, along window tracks, and around vents.
Dust ceiling fans, shelves, blinds, baseboards, and closet interiors. Wipe down doors, handles, and trim. Vacuum carpets carefully, especially along edges and corners. If the property has hardwood, laminate, or tile flooring, sweep first and then mop using an appropriate cleaner. For carpeted rooms, consider a deeper vacuuming pattern to lift trapped dust and hair. Move out cleaning in bedrooms should also include closet rods, drawers, and any built-in storage.
Living rooms often contain more decorative items and electronics, so unplug and clean around entertainment centers, tables, and lamps. If the property has marks on walls, use a gentle cleaner or stain-removal method approved for the paint type. Clean, dust-free rooms make a strong impact and help the overall move out cleaning effort feel complete.
Floors, Walls, and Baseboards
The finishing details that matter
Floors, walls, and baseboards can dramatically affect the final impression of a property. Even if countertops and appliances shine, dirty trim or scuffed floors can make the place seem neglected. That is why these surfaces deserve special attention during move out cleaning.
Baseboards often collect dust in a thin line that is easy to overlook. Use a microfiber cloth, vacuum attachment, or damp sponge to remove buildup. For walls, focus on fingerprints, minor marks, and smudges around switches, doorframes, and frequently touched surfaces. If the walls have stubborn spots, test a gentle cleaner on a small section first.
Floor care depends on the material. Carpet should be vacuumed thoroughly, while hard floors may need sweeping, mopping, or spot treatment for residue. Move out cleaning becomes much more effective when these finishing details are included. A property may look significantly brighter and more open after dust and grime are removed from the lower edges of each room.
H4: If the floors are damaged or heavily stained, document the issue before cleaning if you are a tenant. That way, you can separate normal wear from actual cleaning concerns.
Windows, Blinds, and Glass Surfaces
Letting natural light shine through
Windows and glass surfaces are often overlooked in move out cleaning, yet they can have a major impact on how clean a property feels. Smudged glass, dusty blinds, and dirty tracks reduce natural light and make rooms appear dull. Cleaning them properly can instantly improve the atmosphere of the entire space.
Start by wiping the window sills and tracks, since these areas frequently collect dust and dead insects. Then clean the glass using a streak-free method and a product suitable for the window type. If the property has blinds, vacuum or dust each slat carefully. Curtains should be laundered or vacuumed if they are staying with the property.
Glass shower doors, mirrors, and cabinet fronts should also be polished during move out cleaning. These surfaces reflect light and help rooms look more spacious when free of residue. A little extra effort here can create a big visual payoff, especially in properties that need to look bright and welcoming.
How to Handle Stubborn Stains and Problem Areas
When normal cleaning is not enough
Some areas require more than basic wiping and mopping. Move out cleaning often reveals stains that have accumulated over time, including grease on kitchen surfaces, hard water deposits in bathrooms, carpet spots, or adhesive residue from hooks and stickers. These issues may need specific products or extra elbow grease.
For stubborn stains, identify the surface first. Different materials require different cleaning methods. For example, natural stone should not be cleaned with harsh acidic products, while laminate may respond well to mild detergents and microfiber cloths. Always check manufacturer recommendations when available. Move out cleaning should improve the property without causing damage.
If a stain remains after reasonable effort, avoid over-scrubbing in a way that could harm the finish. In some cases, documenting the issue and moving on is better than creating additional damage. The goal is a presentable and hygienic property, not perfection at the expense of the surfaces themselves.
H5: Common trouble spots include oven grease, toilet mineral stains, shower grout, carpet spots, cabinet handles, and wall scuffs near furniture.
DIY Move Out Cleaning vs Professional Services
Choosing the right approach
Many people complete move out cleaning on their own, especially if the property is small or the timeline allows enough time for detailed work. A do-it-yourself approach can save money and gives you full control over how the property is cleaned. It is often a good choice when you already own cleaning tools and products or when the unit is only lightly used.
However, professional move out cleaning services can be valuable when you are short on time, dealing with a large property, or facing significant buildup. Professionals usually bring specialized equipment, efficient systems, and experience with difficult tasks such as oven cleaning, bathroom descaling, and carpet detailing. They can also help if you want a faster turnaround before inspection or listing photos.
The best choice depends on budget, schedule, and cleaning condition. Some people handle the basic tasks themselves and hire out only the hardest parts. Either way, consistent move out cleaning can reduce stress and help ensure the property is in solid condition for handoff. If your moving deadline is close, contact us today to explore your options.
Time-Saving Tips for Efficient Move Out Cleaning
Work smarter, not harder
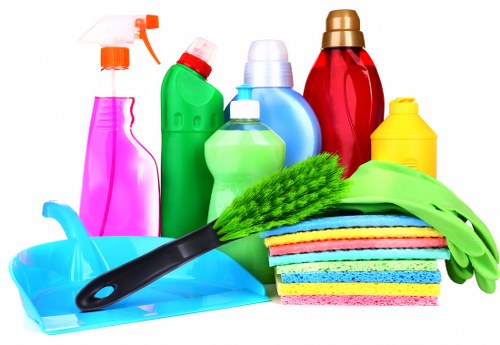
Because move out cleaning can be time-consuming, efficiency matters. One of the easiest ways to save time is to gather all supplies before starting. Keep microfiber cloths, gloves, sponges, garbage bags, a vacuum, mop, disinfectant, glass cleaner, and scrub brushes in one place. This prevents repeated trips and interruptions.
It also helps to clean from top to bottom and from dry tasks to wet tasks. Dust first, then wipe surfaces, then vacuum, then mop. This process prevents dust from falling onto already cleaned areas. If you are cleaning multiple rooms, complete one space fully before moving to the next. That approach makes move out cleaning feel more manageable and provides visible progress.
Here are a few additional strategies:
- Set a timer for each room to stay focused
- Use a caddy to carry supplies easily
- Throw away trash as you go
- Keep laundry, donations, and recycling separate
- Work with a second person if possible
These habits can make move out cleaning much less overwhelming. Efficiency does not mean rushing; it means using a sensible process that reduces repeated work and helps you stay on schedule.
Move Out Cleaning for Renters, Owners, and Landlords
Different needs, same goal
Move out cleaning looks a little different depending on your role. Renters usually focus on meeting lease expectations and avoiding deductions. That means paying special attention to areas landlords or property managers are likely to inspect, such as appliances, bathrooms, floors, and cabinet interiors.
Homeowners preparing to sell often focus on presentation and appeal. Clean surfaces, bright windows, and fresh-smelling rooms can influence buyer perception. In this case, move out cleaning contributes to a stronger showing and a more polished overall impression.
Landlords and property managers often prioritize turnover speed and consistency. Their goal is to prepare the property for the next tenant quickly while maintaining a respectable standard. For them, move out cleaning may be part of a larger turnover process that includes repairs, painting, and maintenance inspections. No matter the situation, the same principle applies: a clean property is easier to hand off and easier to receive.
How to Prepare Before You Start
Organization matters
Preparation makes a major difference in move out cleaning. Before starting, remove all personal belongings, furniture, food, and trash. The more empty the property is, the easier it becomes to reach every corner and surface. Empty rooms also reveal hidden dirt that may not have been visible earlier.
Next, inspect the property and list any problem areas. Look for marks on walls, stains in sinks, debris inside drawers, and dust near vents. This quick walkthrough gives you a better idea of the time and supplies you will need. If you are sharing the property with others, assign specific rooms or tasks so the work is divided fairly.
Finally, make sure utilities are still on while cleaning. Water and electricity are often necessary for effective move out cleaning, especially when tackling bathrooms, kitchens, and lighting fixtures. Without them, the job becomes much harder. A little preparation can save significant time later.
Common Mistakes to Avoid
Small errors can make a big difference
Even a well-intentioned cleaning effort can fall short if certain details are missed. One common mistake is cleaning too quickly and overlooking hidden areas like behind toilets, under sinks, or inside cabinets. Another is using the wrong product for a surface, which can cause damage or leave residue behind.
People also sometimes forget that move out cleaning includes the property’s details, not just the obvious surfaces. Light fixtures, vents, switches, handles, and baseboards matter just as much as counters and floors. Skipping these items can make the property appear less clean overall.
Another mistake is waiting until the last minute. Move out cleaning takes longer than most people expect, especially if buildup has accumulated over time. Starting early gives you room to handle surprises and avoid rushed work. If the property is large or in rough condition, professional help may be the smarter choice. Book your service now if you want to reduce pressure and stay on schedule.
Final Inspection Tips
Checking your work before you leave
After the main work is done, conduct a careful final inspection. Walk through the property room by room and view each area as if you were seeing it for the first time. Look for streaks, dust, missed corners, trash, and surface smudges. Move out cleaning is most successful when it ends with a detailed review.
Pay attention to smell as well as appearance. Fresh air, clean drains, and emptied trash bins can help a property feel truly finished. Open windows briefly if possible, and make sure no cleaning supplies, food items, or personal objects have been left behind. The final pass is also a good time to photograph cleaned spaces for your records if needed.
If you notice something missed, address it immediately. A short final touch-up can make the difference between a decent exit and a polished one. In many cases, this last stage is where move out cleaning really proves its value.
Conclusion: Leave the Property in Great Shape
Move out cleaning is more than a finishing chore. It is a practical, respectful, and often necessary step in the moving process. Whether you are leaving a rental, selling a home, or preparing a property for the next occupant, a well-executed cleaning plan supports a smooth transition and a strong final impression.
By focusing on kitchens, bathrooms, floors, windows, and all the overlooked details in between, you can bring the property back to a clean and presentable state. The process may take effort, but the results are worth it. You will save time during the move, reduce stress, and leave the space in better condition for whoever comes next.
If you are facing a tight deadline or simply want a spotless finish without the hassle, do not wait until the last minute. Contact us today and book your service now to make move out cleaning easier, faster, and more effective. A clean departure is the best way to close one chapter and begin the next with confidence.